Installation of a Level custom mural requires more attention to detail than the installation of standard repeat wallcovering. The individual panels that comprise your mural must be installed in the correct orientation and sequence, and there are special considerations to ensure a successful installation. Before beginning installation, thoroughly read all included installation instructions and installation diagrams.
BEFORE INSTALLATION
Confirm that you have the correct product for your installation.
Familiarize yourself with the installation diagram, and look for any potential discrepancy between the diagram and the actual installation space.
Inspect the mural. If at all possible, unbox and inspect every panel of the mural ahead of time, looking for any apparent defects. If space doesn't allow the entire mural to be laid out, inspect each panel as you prepare them for installation.
Assess all walls for significant bowing or other uneven surfaces that may cause misalignment of panels.
Follow all included installation instructions and installation diagrams.
If no defect is evident before installation, the material should be inspected after installing three (3) panels. Should you discover any problems at this time (or at any point during installation), STOP IMMEDIATELY and CONTACT LEVEL at (216) 432-1400 x.108. LEVEL WILL NOT BE RESPONSIBLE FOR CHARGES OVER THREE (3) PANELS OF MATERIAL.
This video explains the various installation aids that are printed on each wallcovering mural panel. As always, be sure to read and understand the specific installation instructions included with your Level product.
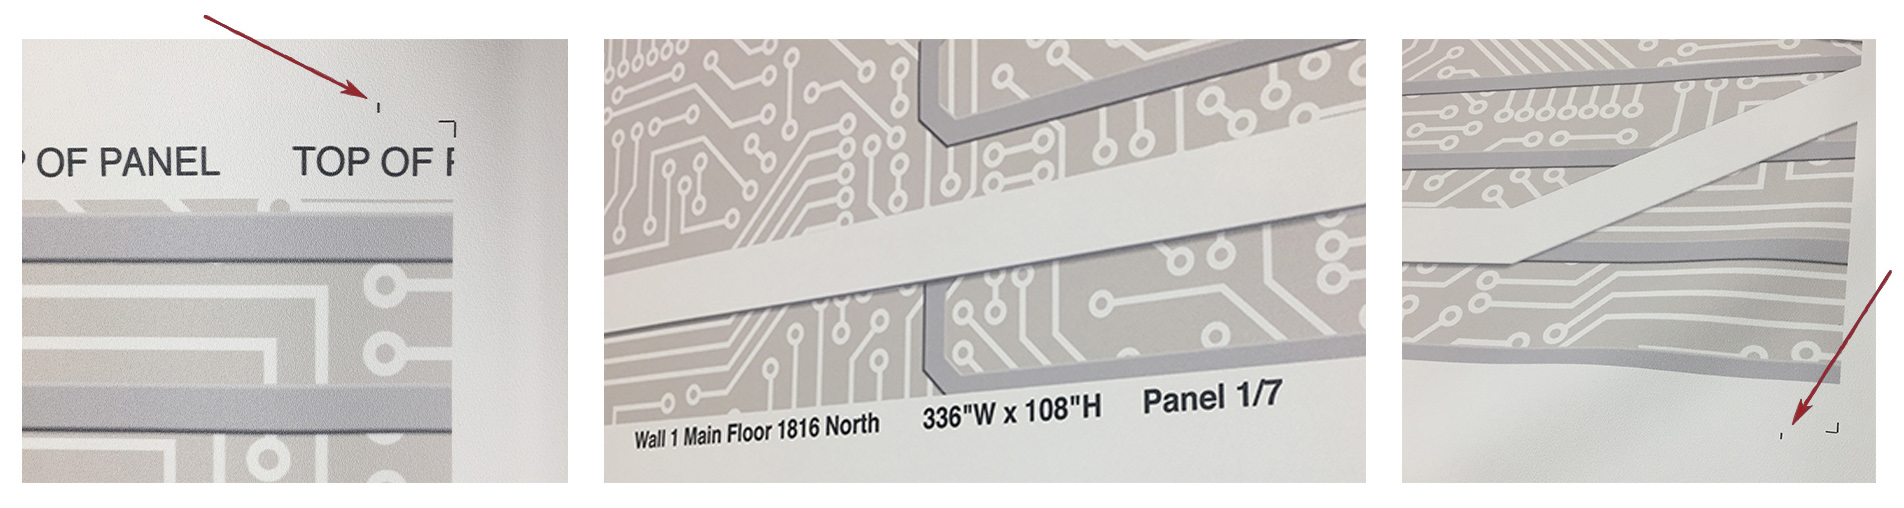
And here's a static view of that same information
The first photo shows the top of the panel with the double-cut indicator.
The next photo is an example of the information provided at the bottom of each panel.
The last photo shows the bottom of the panel with the double-cut indicator.
This video demonstrates how to achieve proper panel alignment.
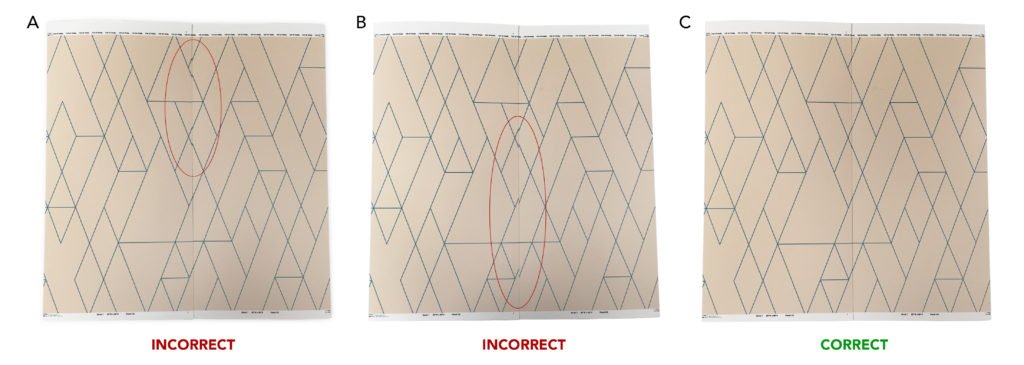
And here's a static view of that same information:
INCORRECT: In this demo, the two panels have been visually aligned. The double-cut indicators are not matched up/overlapped at both ends. This caused the bottom to align, but not the top.
INCORRECT: In this demo, the two panels have been visually aligned. The double-cut indicators are not matched up/overlapped at both ends. This caused the top to align, but not the bottom.
CORRECT: The mural has been aligned following the double-cut indicators in this demo. When these lines are matched up, the mural will perfectly align. This will allow for a successful double-cut and a perfectly fitted seam.
SEND US A PIC!
We would also love for you to send us a photo of your Mural installed. Send any installation pictures to emarketing@surfacematerials.com